Main Crestron Touchscreen
The main Crestron touchscreen is located in the projection booth, in the left AV rack .
Screen 1
System Power
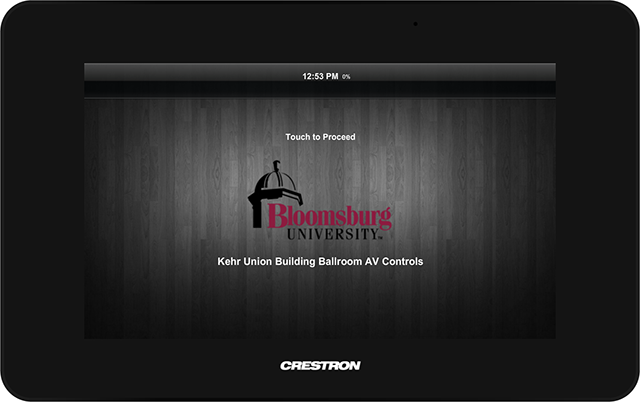
Touch the screen to activate. Follow the on-screen directions.
To eject the touchscreen from the system rack, press the UP Arrow button.
The current time is shown in the center of the header bar. The battery life percentage is shown to the right of the time.
Screen 2
Choose Room configuration
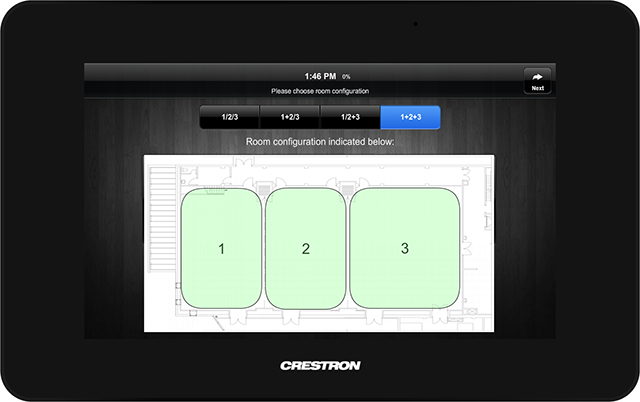
Choose the room configuration from the menu bar. The chosen room configuration is indicated in the graphic below. Combined rooms are represented in green. Uncombined rooms are represented in red. The graphic is not a button and is only a visual representation of the room configuration.
- 1/2/3 - All rooms are separate. No rooms are combined. All rooms are represented in red.
- 1+2/3 - BR 1 and BR 2 are combined - represented in green. BR 3 is separate - represented in red.
- 1/2+3 - BR 1 is separate - represented in red. BR 2 and BR 3 are combined - represented in green.
- 1+2+3 - All rooms are combined into one large room. No rooms are separate. All rooms are represented in green.
Press next button in upper right corner to continue to the next screen.
Screen 3
Configure AV
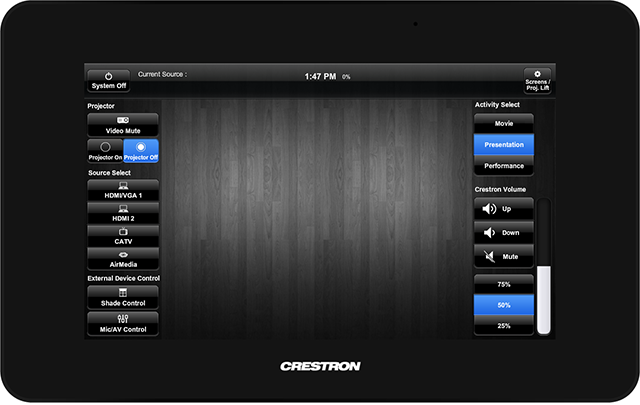
Use the buttons on screen 3 to configure the AV for your event. Controls are grouped as shown below.
To return to previous screens, press the back arrow in the upper left of the page.
Projector
- Video Mute – When selected, the audio and video of the current video source will be muted. No audio will be heard from the sound system, and no video will be projected from the projector. To unmute (show and hear source material) select the video mute button.
- Projector On – When selected the BR 1 large screen descends, the projector lift descends to program playback height, and the projector is powered on.
- Projector Off
- Default status.
- When selected the BR 1 large screen ascends, the projector lift ascends to storage height, and the projector is powered off.
Source Select
When a source is selected, additional controls for the activity are shown in the center screen area. If an activity does not have additional controls, then the message “There are no available controls for this activity” is displayed in the center screen.
- HDMI/VGA 1 - “There are no available controls for this activity”
- HDMI 2 - “There are no available controls for this activity”
- CATV
- Current channel is shown in the header.
- Closed captioning may be shown by selecting the Closed Captions button. If a channel does not provide closed captioning, then no captions will be seen.
- Channel up/down buttons are used to manually scroll through channels.
- Favorite channels are accessed from the scrolling menu in the center of the page. Selecting one of the favorite channels will change the channel to the selected channel/network. Scroll up or down the menu by placing your finger on the list and moving it either up or down.
- Use the numeric keypad to enter channel numbers.
- To select single digit channels you may enter either only the individual number, or the number preceded by a zero (e.g. “2” or “02”).
- AirMedia
Activity Select
- Movie – Switches to Movie Mode.
- May use subwoofer outputs.
- Main program sound from performance speakers.
- Presentation
- Default mode.
- Uses the House Sound system for sound (NOT the Midas M32 console, Performance Stage Rack, or Subwoofer(s)).
- Performance – Switches to performance mode.
- This mode uses the Midas M32 console, Performance Stage Rack, and subwoofer(s) for sound (Not the House sound system or the house mic/AV inputs!).
- Presentation controls may be used in performance mode.
Crestron Volume
The volume level of anything connected to the HDMI 1 / VGA 1, or HDMI 2 video inputs is controlled using this volume control.
NOTE: The current volume level is indicated by the vertical bar to the right of these 6 buttons.
- Up
- Down
- Mute
- Preset volumes
- 75%
- 50%
- 25%
External Device Control
Shade Control
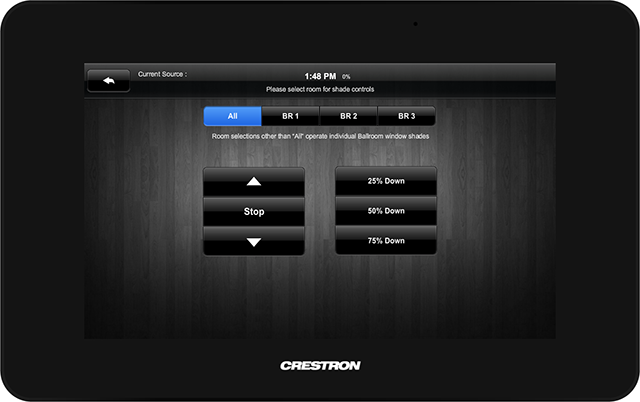
- All – Controls shades for all 3 ballrooms.
- BR 1 - Controls only the ballroom 1 shade. Note that if using the BR 1 main projection screen, shade should be closed to avoid washout of the screen.
- BR 2 - Controls only the ballroom 2 shade.
- BR 3 - Controls only the ballroom 3 shade.
- Up Arrow – Use to manually control shade upward motion.
- Stop button – Use to stop shade movement.
- Down Arrow – Use to manually control shade downward motion.
- 25%, 50%, 75% Down – Preset shade positions.
Volume (Mic/AV) Control
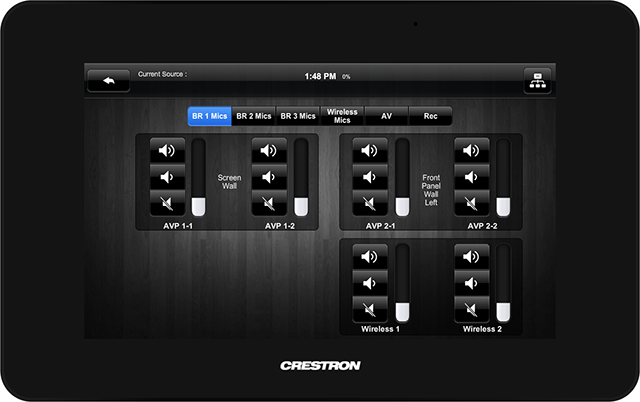
- BR 1 Mics
- Shows controls for all mic inputs and wireless mics hardwired to BR 1.
- Inputs are grouped by input panel locations.
- Input panel locations are labeled for easy recognition. BR 1 only has 2 input panels that have mic or AV inputs.
- Individual input controls include: Volume up, volume down, and mute.
- BR 2 Mics
- Shows controls for all mic inputs and wireless mics hardwired to BR 2.
- Inputs are grouped by input panel locations.
- Input panel locations are labeled for easy recognition. BR 2 has 3 input panels that have mic or AV inputs.
- Individual input controls include: Volume up, volume down, and mute.
- BR 3 Mics
- Shows controls for all mic inputs and wireless mics hardwired to BR 3.
- Inputs are grouped by input panel locations.
- Input panel locations are labeled for easy recognition. BR 3 has 3 input panels that have mic or AV inputs.
- Individual input controls include: Volume up, volume down, and mute.
- Wireless Mics
- Shows controls for all wireless microphones according to ballroom.
- Individual input controls include: Volume up, volume down, and mute.
- AV
- Shows controls for all AV inputs according to ballroom.
- Individual input controls include: Volume up, volume down, and mute.
- Rec
- Indicates audio outputs for program/event recording.
- Each Ballroom has two audio outputs that can feed external recording equipment. These provide an audio feed of every mic or AV device going through the sound system.
- Individual input controls include: Volume up, volume down, and mute.
Header Bar
The following information is shown in the header bar: Current Source information, Current System time, and the Current Touchscreen/tablet battery life. Two main buttons reside in the header bar.
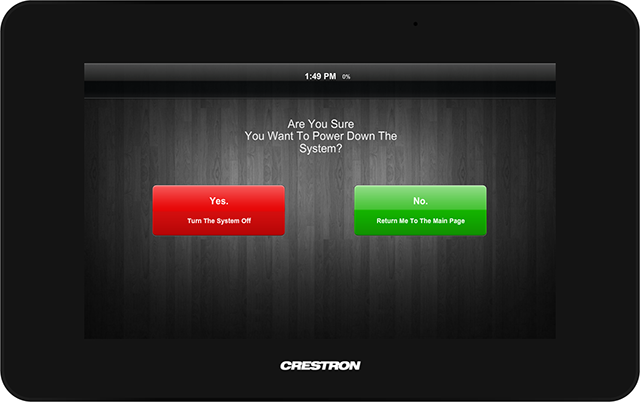
System Off
- Yes. Turn the system off.
- Powers down sound system.
- BR 1 large screen ascends
- The projector lift ascends to storage height, and the projector is powered off.
- No. Return me to the main page.
Gear icon, Screens / Proj. Lift
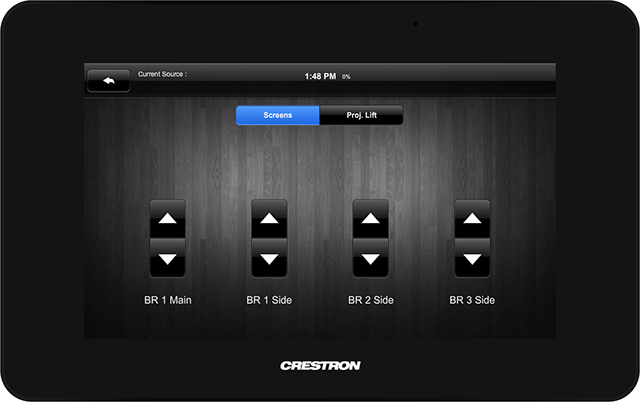
These are separate manual controls for the BR 1 main projection screen, all (BR 1, BR 2, and BR 3) side projection screens, and the BR 1 main projector lift.
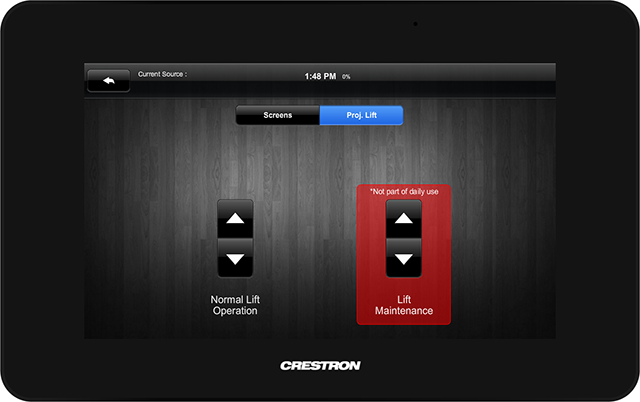
- Normal Lift operation – Manually operates projector lift within either storage height or program height parameters.
- Lift Maintenance (PASSWORD PROTECTED) – Lowers the projector lift and projector to maintenance level (approx. 3-4 ft above the floor). CHANCES ARE 99.9% POSITIVE THAT YOU DO NOT NEED THIS FUNCTION ON A DAILY BASIS. DON'T TOUCH IT!
